
Diptic Pro Tip #2: Breaking the Frame
23 Jan 2013
Source: Created by @troyaynes, winner of the Layover My Diptic Contest.
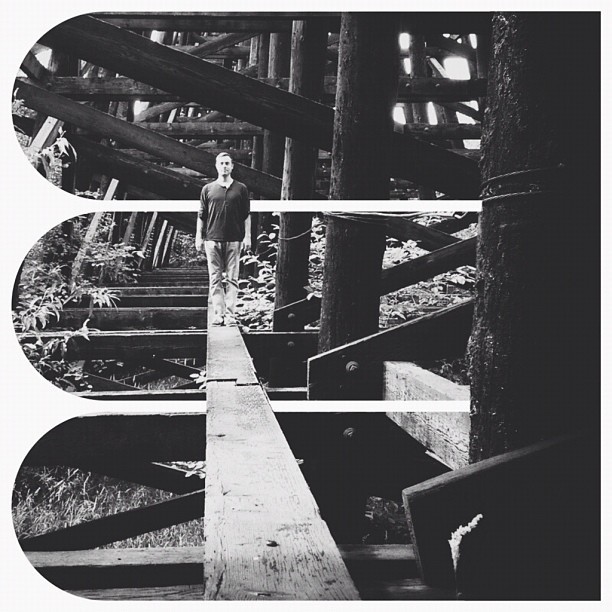
Have you ever seen a Diptic like this? It appears as though the images are "coming out" of the frames, and it looks pretty awesome. Awesome? Yes. Difficult to achieve? No! Follow these six steps and you'll impress your friends with your mobile photography skills in no time.
1. Create a Diptic and import the same photo into two frames, creating a Split Diptic. Line the images up so they look like one image separated by the frame line. Export and save it to your device.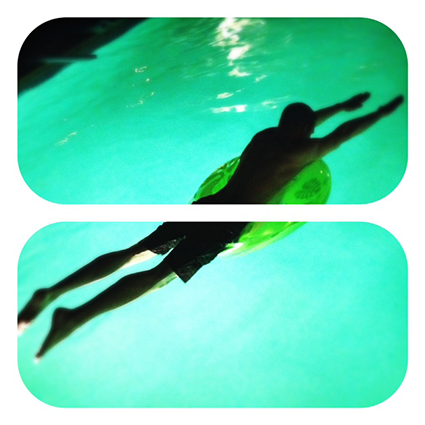
2. Open a photo-blending app (we use our app Layover, which costs $.99 in the iTunes Store) and import the original photo into the first layer.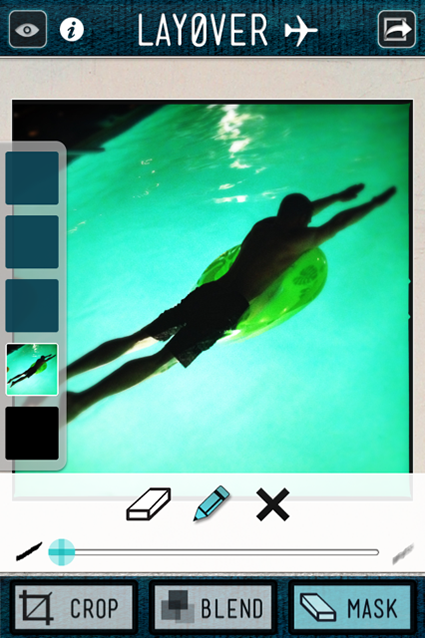
3. Import the Split Diptic into the second layer.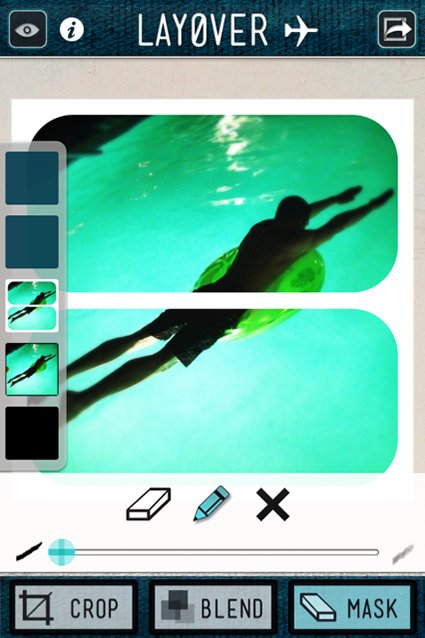
4. From the Split Diptic layer, use the Mask feature and erase part of the white frame that separates the two pictures, letting the first layer show through. 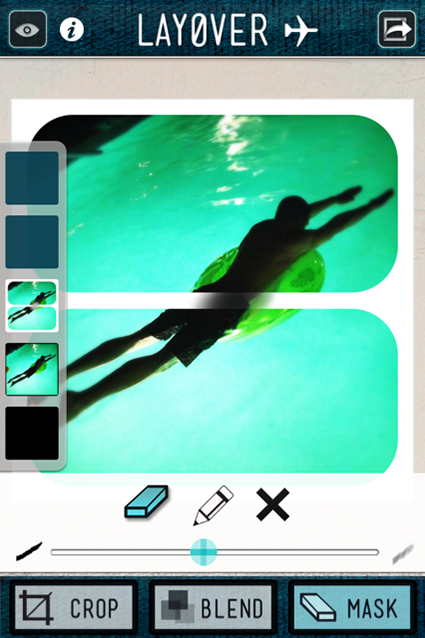
5. Keep erasing until you achieve the desired effect. 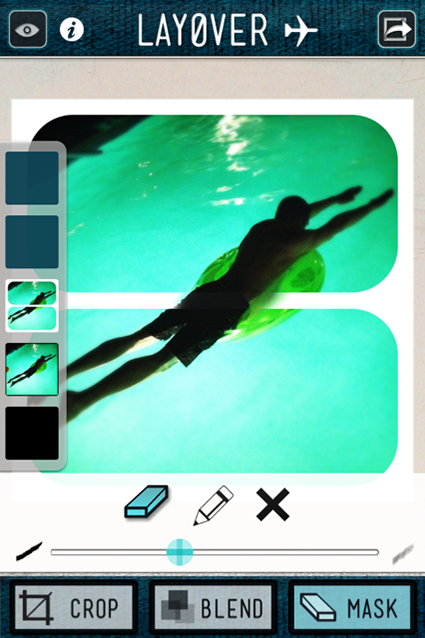
6. From the Split Diptic layer, export the image.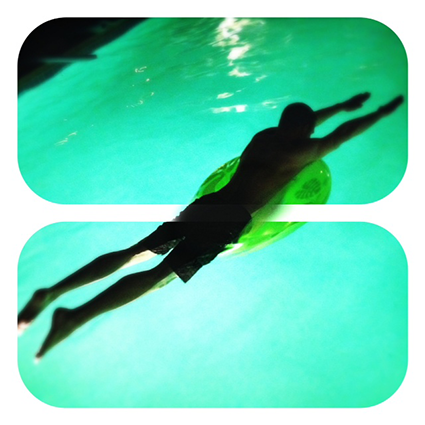
There you have it -- six simple steps to take your Diptics to the next level! That doesn't seem so difficult, right? Shoot us an email at support@dipticapp.com or contact us on Facebook or Twitter if you have questions.
Diptic Blog
- Diptic Super 8
- Diptic's iOS 8 Photo Extension
- Diptic is Now Optimized for iOS 8
- What happened to my Camera Roll? Where are my photos?
- Importing Photos on Diptic for iPhone
- Introducing Diptic 7.0
- Diptic is now Available on Windows 8.1
- Diptic Video: 50 Percent Off For a Limited Time
- Introducing Diptic Video 1.1 (Now With Slow Motion)
- Diptic Pro Tip #7: Printing your Diptics
- Diptic for Android is now Part of Google Play for Education
- Diptic for Mac: Best of 2013
- Diptic PDQ: Best of 2013
- Diptic for Windows Phone 8 Now Supports Low-Memory Devices
- Introducing Diptic Video: Make Moving Picture Masterpieces
- Diptic is Now Available On Windows Phone 8
- Diptic for Mac 2.0
- Diptic Technical Tutorials by the App Whisperer
- Diptic PDQ Giveaway
- Q&A: Diptic Vs. Diptic PDQ
- Introducing Diptic PDQ: Powerful Designs… Quickly (aka: Pretty Dang Quick)
- Diptic is Now on Amazon!
- All Things Text
- Diptic for Android Update
- Diptic Pro Tip #6: Select Multiple Photos At Once
- Five Simple Tips to Make Great Diptics
- Diptic at the WWDC
- Diptic for Instagram
- Tutorial: Using Diptic and Layover to Create a Composite Image
- Diptic Pro Tip #5: Selecting A Background Color
- Diptic Pro Tip #4: One Image, Two Filters
- Introducing Diptic 6.3
- Introducing Diptic 6.2
- App Stacking
- Diptic Pro Tip #3: Starting Over
- Diptic Pro Tip #2: Breaking the Frame
- Introducing Diptic 6.1
- Diptic Pro Tip #1: Swapping Photos
- #ShowMeYourDiptic Contest Winners
- Introducing Diptic 6: Our Biggest Update Ever
- Mac App Store â Best of 2012
- Show Me Your Diptic Contest
- Announcing the Layover & Diptic Contest Winner
- iOS 6 Privacy Changes
- Diptic is iPhone 5 Ready
- Layover & Diptic Contest
- LA Mobile Arts Festival 2012 Takes Off With Diptic On Board
- Introducing Layover, A New Photo Blending App
- Show My Style Contest
- My Favorite Diptic Contest Winner
- Diptic is the App Store App of the Week
- My Favorite Diptic Contest
- Look Like a Photo Genius With Diptic for Mac
- Tell the Story Contest Winner
- Diptic 5.5: Filters, iPad Retina Display and More!
- Diptic Wins Best Photography Mobile App in 2012 MobileWebAwards
- Tell The Story Contest
- One Million Questions For One Million Downloadsâ¦Well, Just Six Questions
- Diptic Version 5: User Experience and Interface Updates
- Diptic 5! More Layouts, More Features, More Fun!
- Diptic: One Image, Multiple Effects
- Video Demo by AdoramaTV
- Hi, I'm this many! [holds three fingers up]
- twitter background